Introducing our new AI-powered NFT creator
Creating NFTs has never been easier and fun!
Guide: How to create a Dynamic NFT collection
Martin Souto Parga
November 11, 2022
In this guide, we will go through all the steps to deploy a Dynamic NFT collection using One Mint's launchpad.
This type of NFT collection will require two separate contracts:
- One ERC-721 that will hold all the “base” NFTs
- And an ERC-1155 that holds all the customization traits
The "base" traits on the ERC721 DO NOT become ERC1155 when they are swapped, this means that they are not subject to trading individually whereas on the ERC1155 contract each trait will be an individual token that can be traded without the ERC721 base.
Step 1: Generate the base NFT
For this step, we will be using the normal NFT Art Generator by One Mint. (Keep in mind that the traits on the ERC721 can only be swapped and that they cannot be TRADED as ERC1155 tokens)
To generate the “bases” you have a couple of possibilities:
- Generate the collection with ALL the traits that you will use:
This means that there will be no extra traits to add to the NFT and that people will only be able to swap the initial traits that their NFT has equipped when minted. This method can cause some issues with the “epic” and “legendary” traits since those are the most valuable traits people will want to be able to trade them, and if they are generated with the base character this won't be possible, (we recommend holding these traits for the ERC1155 so people will have the option to trade them if they want to). By going this route, there are no exclusive traits either on the ERC721 base NFT or the ERC1155 traits contract. - Generate the collection with “base” layers and then use the ERC1155 to add all the rare traits and variants:
What this means is that only the MUST BE layers will be used to generate the NFT, these can be translated to background, head, body, eyes, and so forth. By doing this, all the “accessories” will only be available as ERC1155 traits and people will be able to ADD to their NFT rather than swapping traits from the base. (This is for example the case with our collection One Mint Genesis)
Step 2: Deploy the ERC721 contract
Again, using One Mint Launchpad, follow the steps to deploy an ERC721 as usual, there are no special procedures on this step.
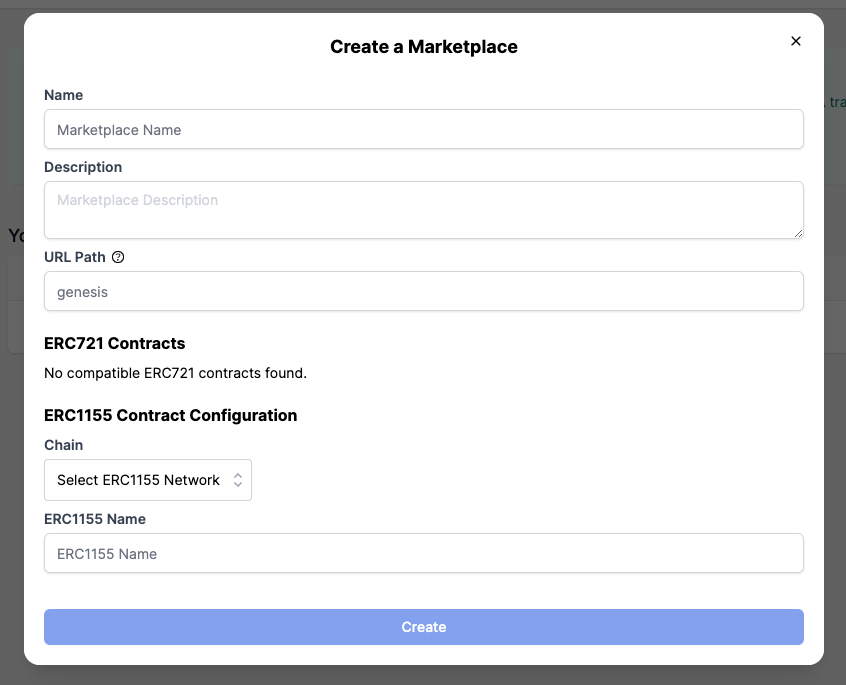
Step 3: Create a Marketplace for the collection on your project's dashboard
Name: put the name of your Collection.
Description: put the description of your Project.
URL path: the “subdomain” for your collection page.
(EX: onemint.io/collections/YOURCOLLECTION)
Select the ERC721 contract that you deployed in the previous step and put a name for the ERC1155 contract that will be created in the next step.
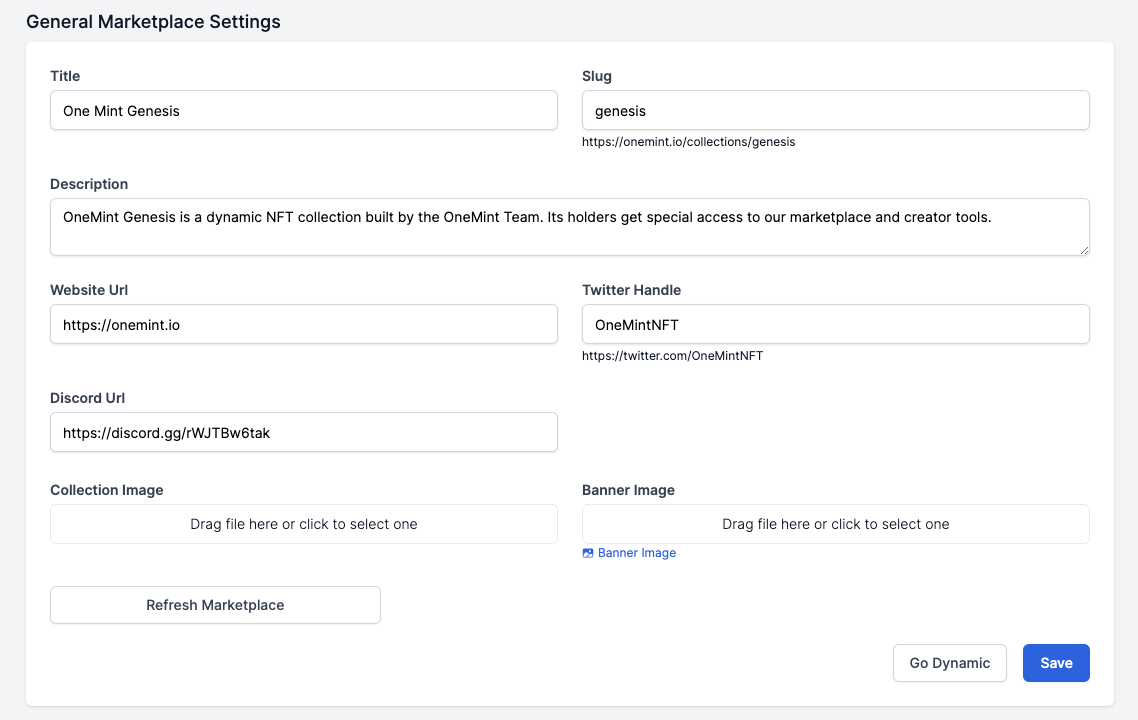
Step 4: Configure your marketplace page and deploy your ERC1155 Contract
Step 5: Add a “Fork”
In this step we will be adding a “fork” from the marketplace setup, the screen which is basically the generation setup page you used to generate the base collection:

Step 6: Adding traits to the “fork”

To add traits you will click “edit” on the fork created in the previous step.
Now you will see the generation screen again and here you will be able to drag and drop files as you would on the normal app.

In this case, we will add 2 new traits to the “backgrounds” layer:

Step 7: Creating the traits
After adding all of our traits in the correct layers, we will go back to the marketplace setup screen to create the traits.
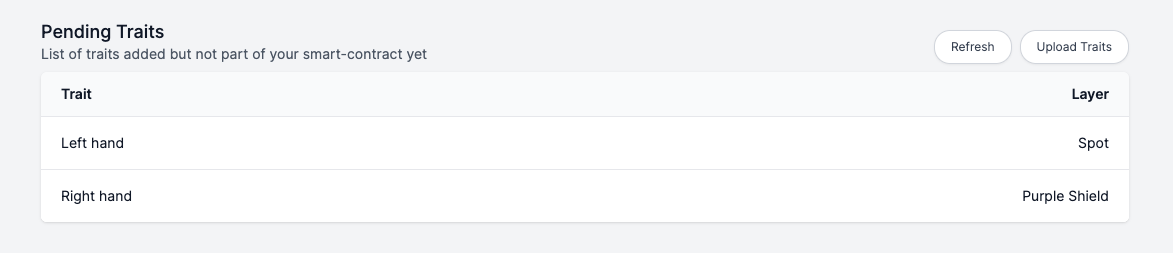
For this, we will click “Create Traits" and then go to the "Traits Contract" to deploy them as ERC1155 tokens.
Step 8: ERC1155 Set up
On this step, we will be able to deploy and edit all of our traits.
We can edit all the info for each individual trait before deploying them.
After they are deployed, we will be able to manage all traits individually or as a group.

Here we have some off-chain and on-chain settings
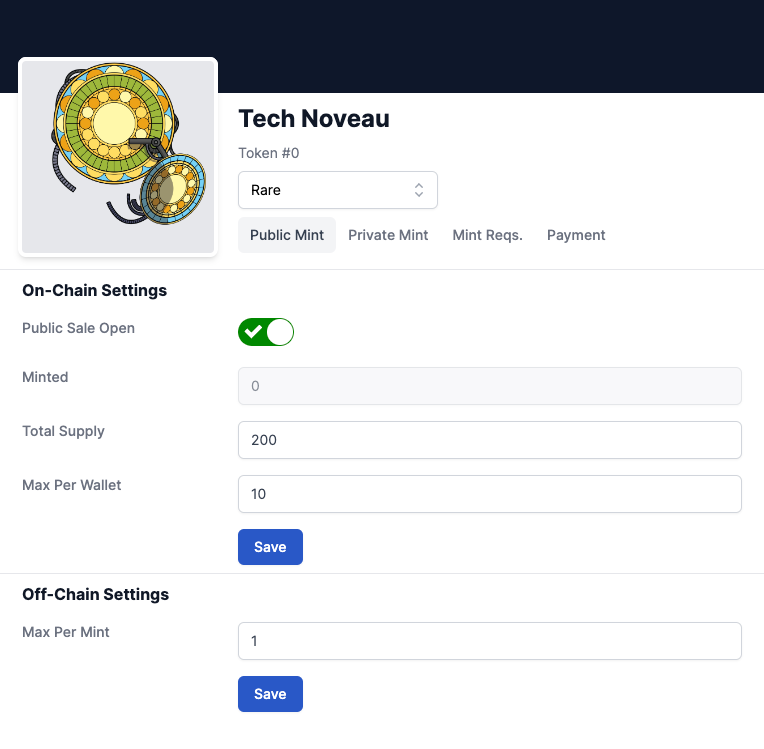
For the on-chain settings (these settings require a gas fee), we have:
- Open/Close sale
- Make the NFT tradable or not
- Total Supply
- Max per wallet
For the off-chain settings (no gas fee needed), we have:
- Whitelist Settings
- Cost
- Max per mint (in 1 transaction)
- Token Rarity
After you have completed all of these steps, your Dynamic NFT collection will be live and ready to be launched so your holders can customize their NFTs.
For insights on how Dynamic NFTs work, visit our other blog posts:
- https://blog.onemint.io/dynamic-nft-overview/
- https://blog.onemint.io/the-first-dynamic-nft-collection/
- https://blog.onemint.io/dynamic-nft-and-gaming/
Want to see them in action? We invite you to get your OMG token and upgrade it with special traits on our marketplace.
Browse other posts